Set up a User Test
At the end of this topic you'll have a usability test based on a prototype in your workspace. Optionally, watch video tutorial on how to set up a user test.
In Brief
Step by step
1. Create a usability test
- Locate the prototype in your workspace, and click on
New Usability Testoption.

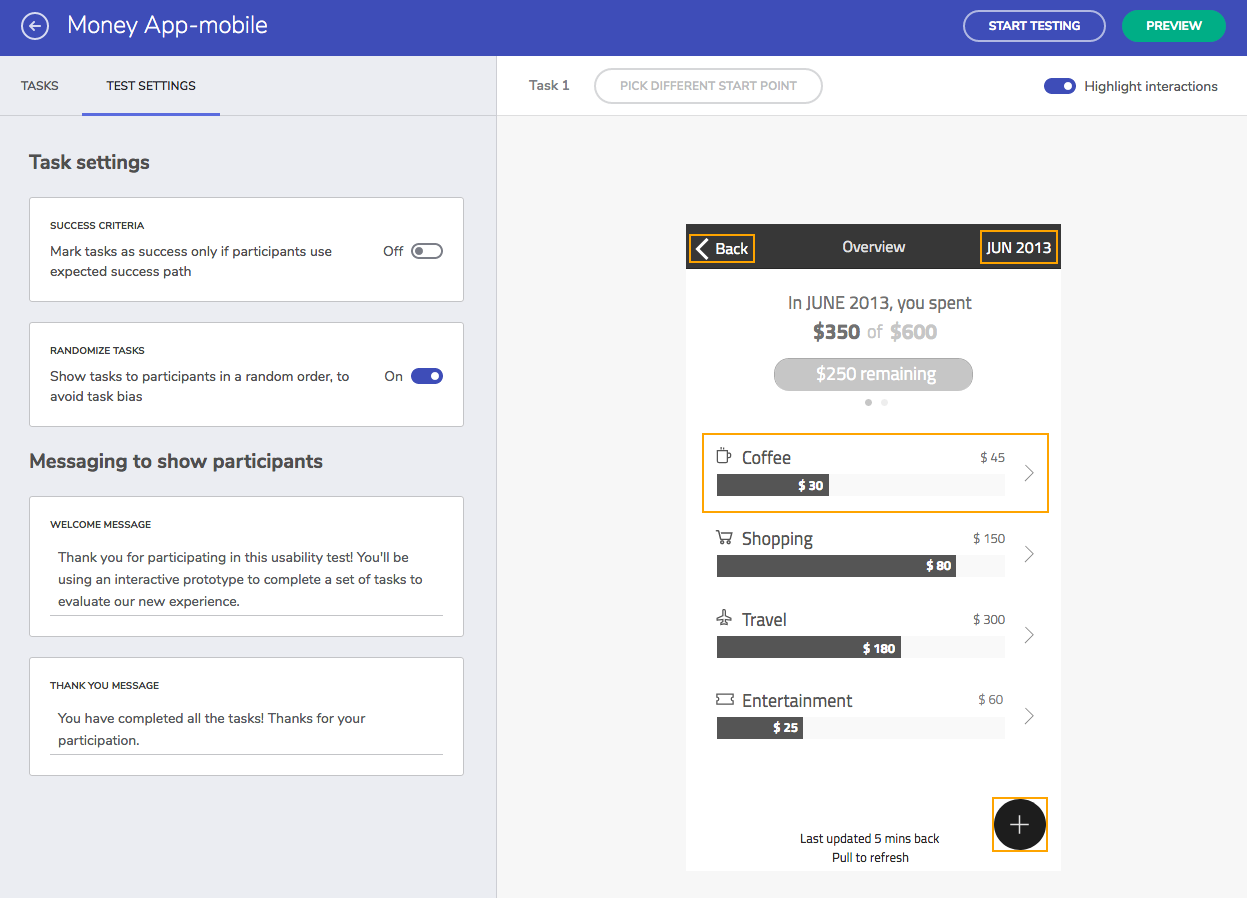
- Optionally, add welcome and thank you messages.The welcome message is what your participants will see before starting the study. For the thank you page content you can suggest future actions for participants completing the study. For example, asking them to go complete a post-study survey.
Note
Select Usability Tests in the navigation bar while signed in to cloud.indigo.design to see and manage all your studies.
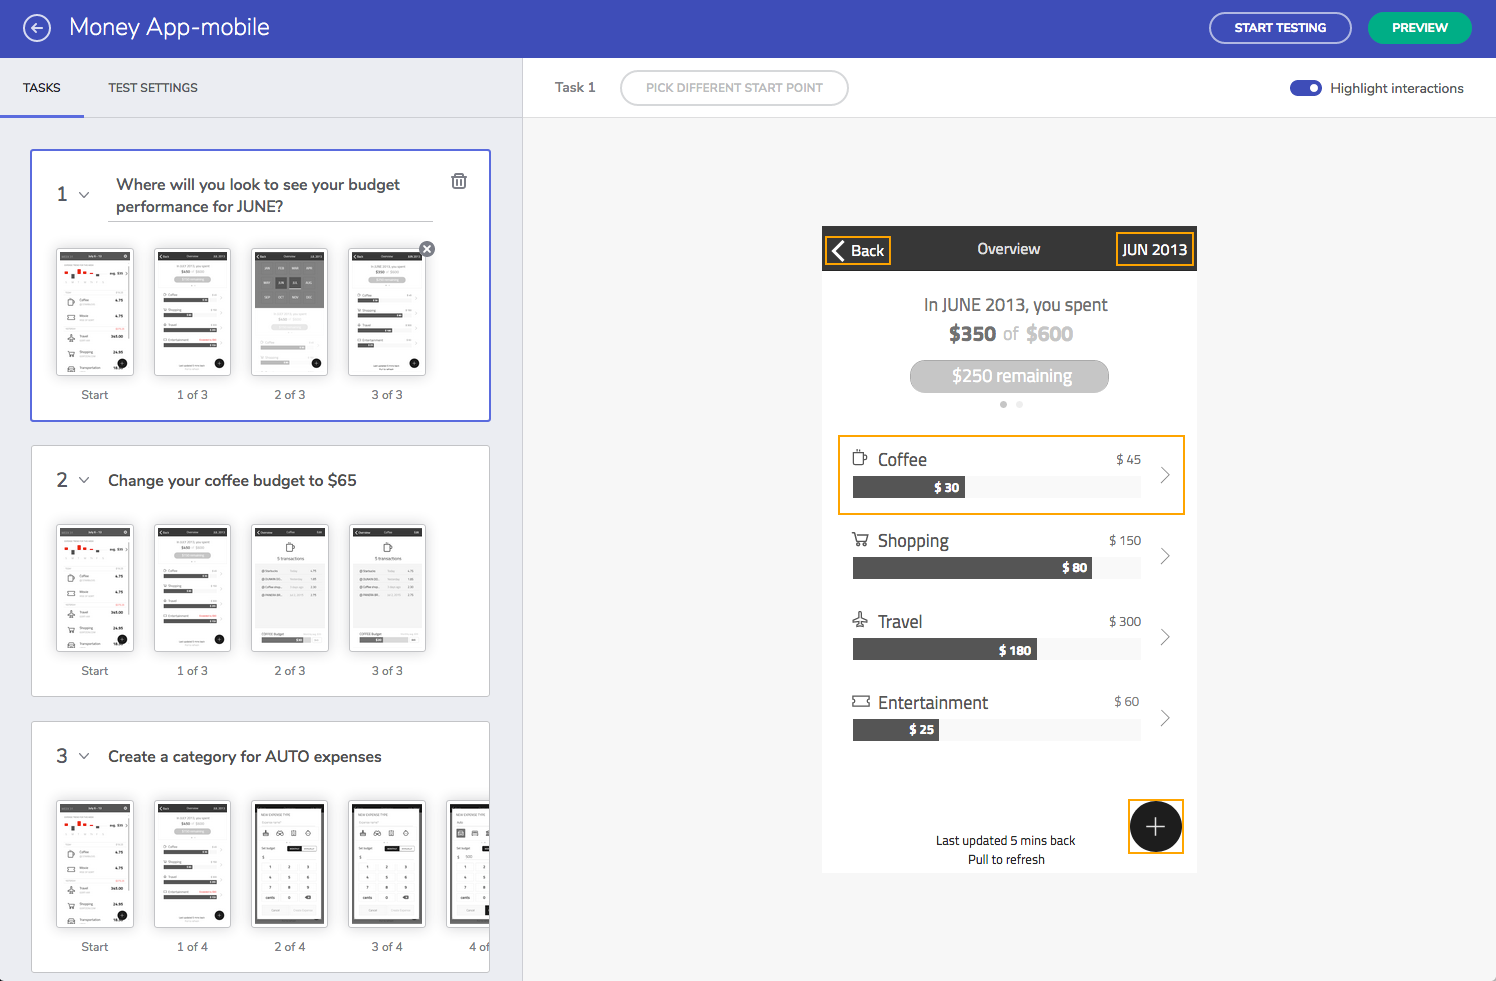
2. Define tasks
You need at least one task to start a usability test.
- To add a task, click on
new task. Then, add a description.
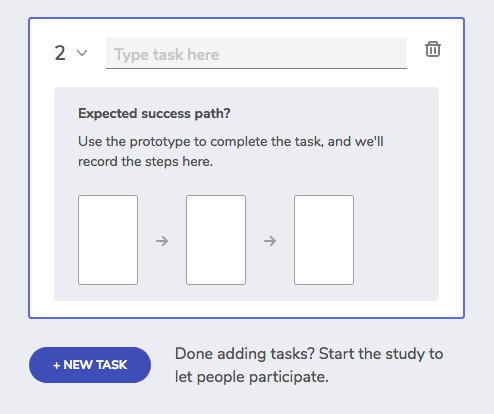
- Define the expected path for completing the task by interacting with the prototype. If you make a mistake, you can always undo the last step.
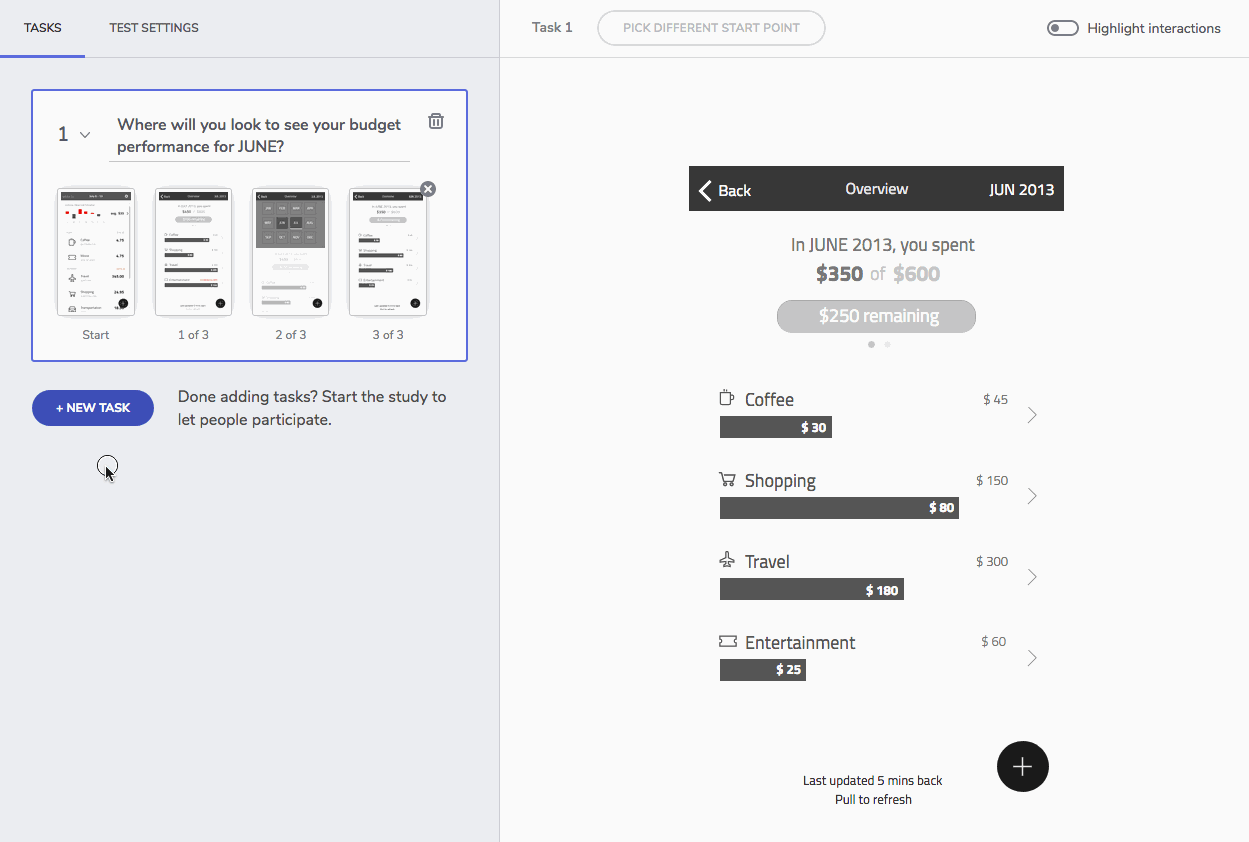
- When you are done recording the path, use the
new taskoption to add more. If you are done adding tasks, go ahead and invite participants.
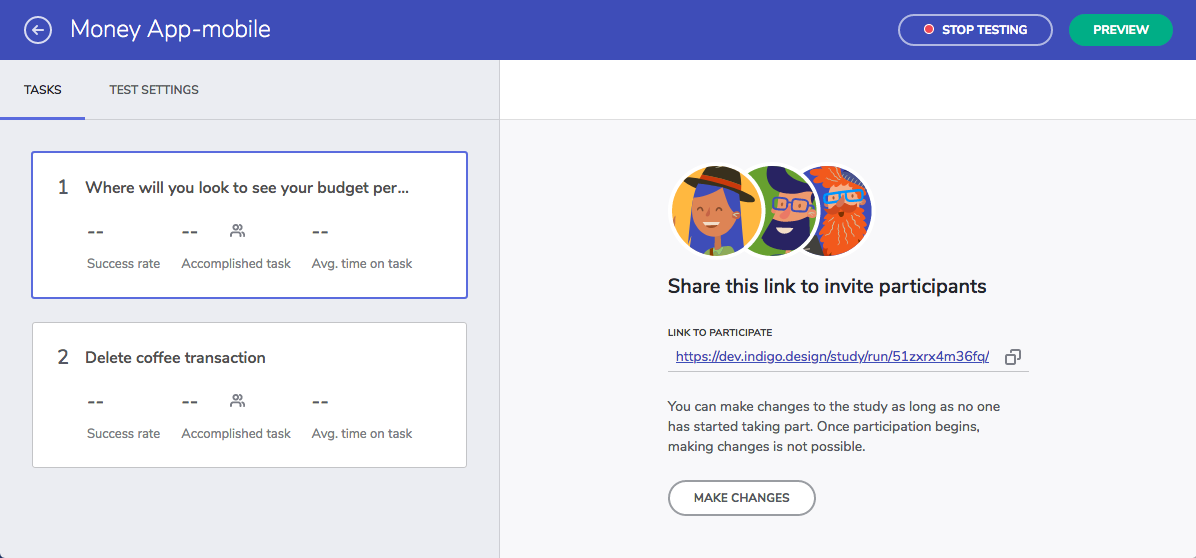
3. Invite participants
To invite participants, click Start Testing option in the main toolbar. Then, share the generated URL let them take part using their web-browser.
Note
Once participation begins, you cannot make changes to your study.
When you are happy with the number of participants, you can use the Stop Testing option to prevent additional sessions.
View page on
 GitHub
GitHub